Using Ansible and Tdarr to Achieve Peace of Mind


This article is companion to a GitHub repository here.
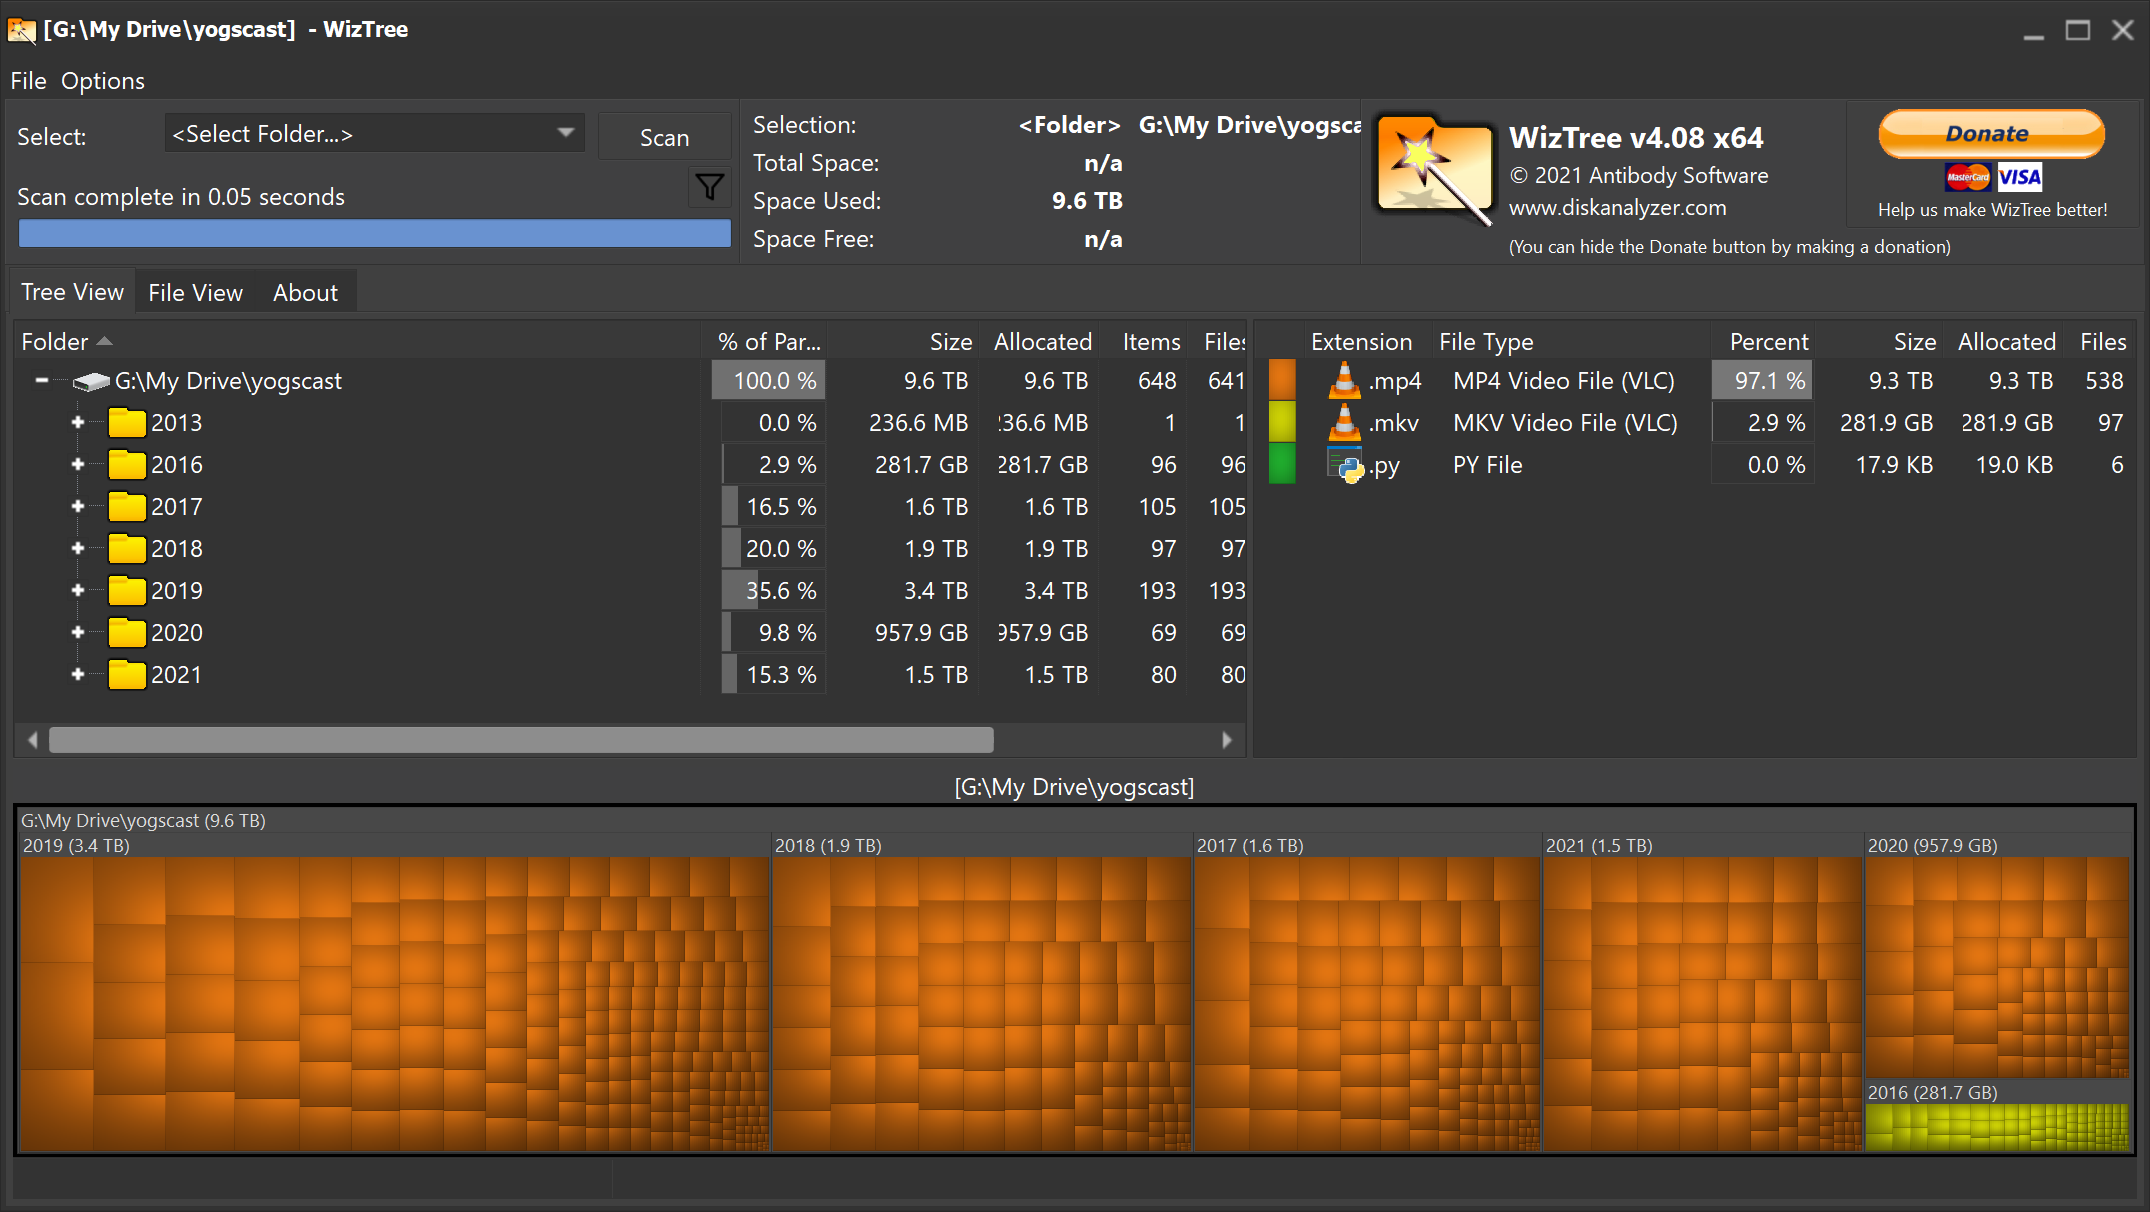
I have an extensive video archive. What started as a simple idea to avoid using the Twitch player in 2016 has evolved into 9.6 terabytes of archival footage clogging up my Google Drive. Keeping these videos in the cloud has served to keep them out of sight and out of mind. However, at the heady age of 24 I'm beginning to re-examine my relationship to data. I would like to bring these files in house and keep them safe with a 3-2-1 backup policy rather than trust in a cloud service provider. That's where Tdarr comes in. Per the website, "Tdarr is a ... transcoding application for automating media library transcode/remux management." That is to say, if I point Tdarr at some videos it will attempt to make them smaller while mantaining the quality.
Why Archive?
I believe it was Aristotle that once said, "The safest data is the data you don't have." So why am I holding on to nearly 10 terabytes of videos? The answer lies in the source. The Jingle Jam is an annual series of live streams throughout the month of December that raises money for various charitable causes. When I started watching in 2013, the Jingle Jam was an excuse to see some of my favorite content producers, Yogscast, in a less formal environment while also raising money for charity so of course I wanted to watch the streams as efficiently as possible.
The major barriers to the endeavour of efficient stream watching are muted vods, the Twitch player, and the sheer amount of content. Starting with the last issue, at its peak the Jingle Jam ran 12+ hours a day, on two channels, nearly every day of December, UK time. It is inconcievable for me to watch the entirety of the Jingle Jam, as I would like to do, live. Therefore, I must needs watch the streams some amount of time after they are completed. Yet, due to the live and relaxed nature of the Jingle Jam streams, the hosts occasioned to sing karaoke or play music that would be hit with a DMCA resulting in muted segments of the Twitch VOD and giving me a worse experience than watching live. Even then, if I were content to watch streams that could get muted, the Twitch player sucks and has sucked since 2013.
There exists only one obvious solution to my consternation regarding the Jingle Jam and that is to record the livestreams as they happen, just as episodes of Doctor Who were saved by recordings of their live broadcasts. All of that data, all of the programming work, all of this blog post, just so that I can play back these streams at my leisure, with the full sound, and in a media player of my choice.

Tdarr or Saving Space with Efficient Encoding
Hereafter we will use encoding and compression interchangably, this is an oversimplification but the distinction is outside of the scope of this article. h.264 is the preeminent video compression standard of today, but it is not without its successors. h.265 compressed video should have similar perceptual quality to that of h.264 at around half the file size. Rather than get in the weeds on the merit of re-encoding video, I'm going to claim that the theoretical 5 terabytes of saved space is worth the effort.
Enter Tdarr, an app whose purpose is to transcode media libraries. Nominally for encoding video you would like hardware acceleration, such as Nvidia's NVENC, to speed the process up. While I technically have access to a GTX 1060 which supports NVENC x265 encoding, in fact it's what I used on the 2016 archives, I don't want to tie up my laptop's GPU. I use my laptop for school work which means we're stuck with CPU encoding. Although between my desktop and home server I have a fair amount of CPU power to go around, I still can't get over the mental hump of tying my resources up. This is how I came to the idea of what I am going to call marginal computing.
Cloud service providers like Azure and AWS allow for preemptible computing, in between continuous tasks there's margin on the server processors where they would otherwise be idle. Preemptible computing slots your task, whatever it may be, into that margin. Thus these providers can offer you not continuous access to resources, but intermittent access to resources, and they do this at a discounted price. Preemptible computing is not appropriate for a transcoding workload of this nature. Some of my video files are 18 hours long, they can't be encoded in that preemptible margin and the nature of modern encoding mechanisms means encoding small portions of a long video results in less efficient space usage. Marginal computing is an inversion of preemptible computing that stems from my realization of, "There are half a dozen processors in this house, if I use a small part of all of them we avoid tying up any one machine but we can get more than one machine's worth of performance."

Tdarr is a distributed transcoding system. Tdarr natively supports having many different machines working on different tasks towards a common goal. Tdarr is perfect for the marginal computing implementation I've described wherein one computer acts as a coordinator for disparate nodes, each of which has its own number crunching capabilities.
Aside
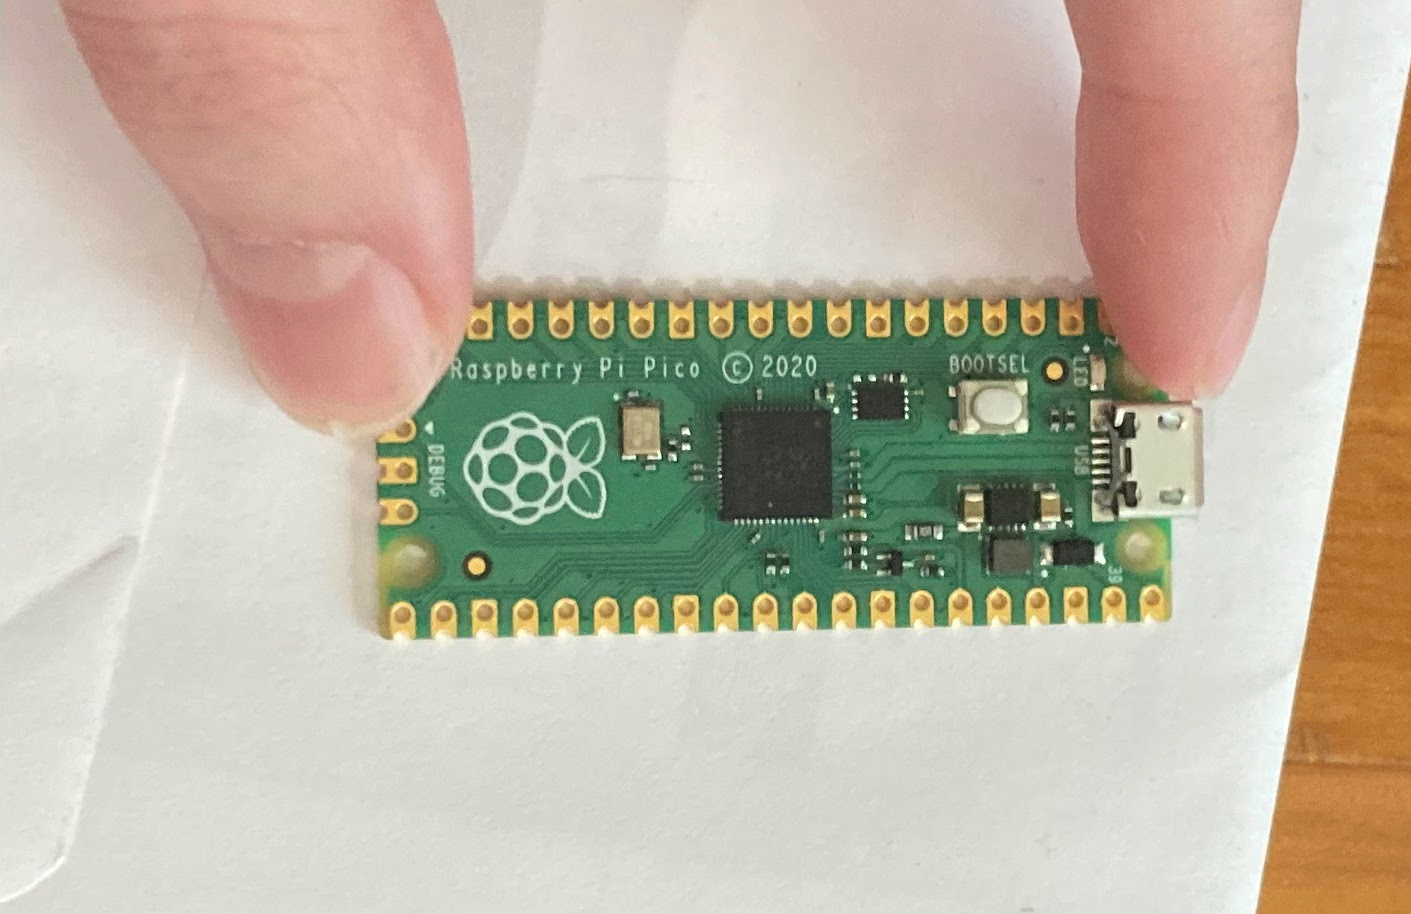
As this idea of transcoding my archives to h.265 tumbled around in my head these last few months, one of the most intriguing ideas to occur to me was making the world's worst x265 encoder. I received a Raspberry Pi Pico as part of a Secret Santa organized on the Brad and Will Made a Techpod Discord server. The Pico is a $4 micro-controller with 264KB of RAM and 16MB of storage. I reasoned that if I ported x265, an open source implementation of the h.265 spec, to the Pico that I would be able to encode video at astonishingly slow rates. But, I don't think this is feasible because while you could do a bunch of clever tricks and use serial communication to fake having more RAM, it feels against the spirit of the thing. I would be interested to hear what the Pico is capable of doing natively, I don't know enough about h.265 to understand how many video frames you need to keep in memory at one time, etc.
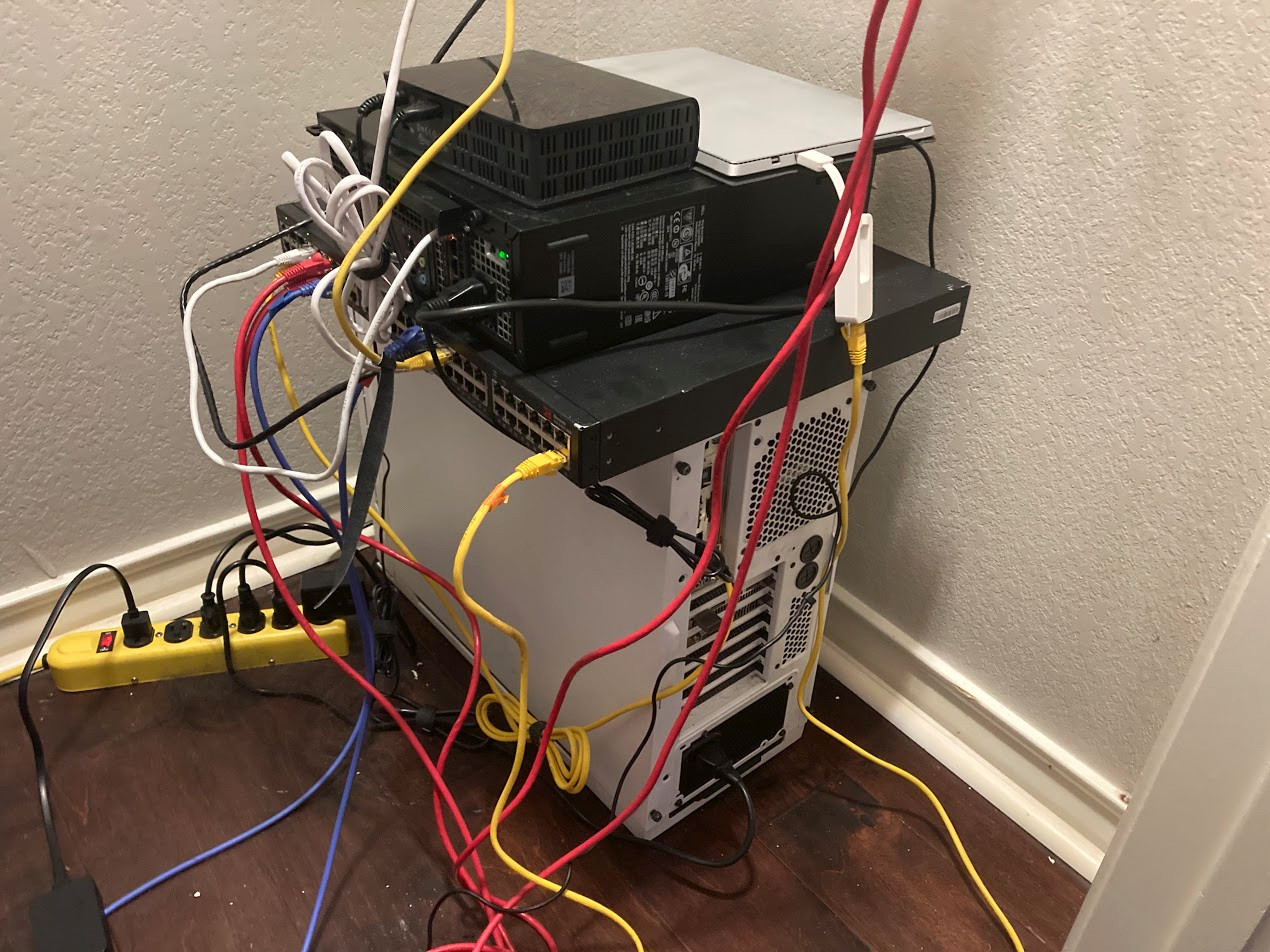
The Hardware
Let's take an inventory of what processors we have to work with as we consider this marginal computing. I have two nodes in my Proxmox cluster, one running a 4790k and the other an i5-4590. These computers have other important tasks, running my home automation, my virtualized Vyos router, etc. So I've decided to devote 2 cores of the 4590 and 2 threads of the 4790k to transcoding. I also have my venerable Surface Pro 3 with its i3-4020y from which I am devoting all 4 blazing fast threads to this endeavor. But Bears, you ask, don't all these fourth generation Intel processors have access to Quick Sync Video? And the answer is yes, they do, but Quick Sync doesn't support HEVC (h.265) encoding until two generations later.
Deploying Tdarr with Ansible
Tdarr requires that your media library be accessible from the same location on each node, combined with the fact that we have three different machines we want to run Tdarr nodes on, it became obvious to me that I should attempt to automate the setup procedure. I used cloud-init to spin up a new Debian VM on each of my Proxmox nodes and installed Debian on my Surface Pro. From there I just had to write a simple Ansible playbook to do the following on each of the three machines.
- Install Autofs and Docker-Compose from the package manager.
- Install Rclone from its install script.
- Setup configurations for the aforementioned apps.
I've uploaded the Ansible playbook to my GitHub here.
Autofs and Rclone
I need access to my NAS and Google Drive for these marginal Tdarr nodes to be effective. This access is important because the largest of my archived videos is 123 GB. I don't want to spare many resources to this project and in the case of the Surface Pro 3 I can't expand its storage so what we do instead is keep as much of the video data off the Tdarr node as possible. Enter Autofs and Rclone.
My NAS is accessible on my local network using NFS. Autofs allows me to access my files JIT and resiliently rather than a pure NFS mount that can be subject to network troubles. Access to the NAS is critical because it's where the nodes store their in-progress transcodes.
- name: Add our auto.nfs file to autofs master
  ansible.builtin.lineinfile:
    dest: /etc/auto.master
    line: "/-      /etc/auto.nfs"
    regexp: "/-      /etc/auto.nfs"
  become: true
- name: Create our auto.nfs file
  ansible.builtin.lineinfile:
    dest: /etc/auto.nfs
    create: yes
    line: "/data 192.168.8.83:/data"
    regexp: "^/data"
  become: true
- name: Restart autofs
  ansible.builtin.systemd:
    state: restarted
    daemon_reload: yes
    enabled: yes
    name: autofs
  become: true
Because the nodes can't put a whole video in storage, they read the videos from Google Drive while transcoding onto the NAS. Rclone is how I pull the videos down from where they're stored in Google Drive and the main feature I take advantage of is rclone mount so that my drive appears as a native folder. As of the time of writing this section of the playbook has limited functionality, specifically it checks if a version of rclone is installed, rather than checking if the most recent version is installed.
- name: Check is rclone is already installed
  stat:
    path: /usr/bin/rclone
  register: rclone_result
- name: Install Rclone if it isn't already
  ansible.builtin.shell: "curl https://rclone.org/install.sh | sudo bash"
  when: not rclone_result.stat.exists
- name: Ensures /root/.config/rclone/ dir exists
  file: path=/root/.config/rclone/ state=directory
  become: true
- name: Configure Rclone
  ansible.builtin.copy:
    src: rclone.conf
    dest: /root/.config/rclone/rclone.conf
  become: true
- name: Ensure gdrive folder exists
  file: path=~/gdrive state=directory
After that we need to do systemd tomfoolery to make sure rclone mounts the gdrive folder automatically.
- name: Check is rclone is already aliased.
  stat:
    path: /sbin/mount.rclone
  register: stat_result
- name: Link rclone to systemd
  ansible.builtin.shell: "ln -s /usr/bin/rclone /sbin/mount.rclone"
  when: not stat_result.stat.exists
  become: true
- name: Copy mount to systemd
  ansible.builtin.copy:
    src: home-bears-gdrive.mount
    dest: /etc/systemd/system/
  become: true
- name: Copy automount to systemd
  ansible.builtin.copy:
    src: home-bears-gdrive.automount
    dest: /etc/systemd/system/
  become: true
- name: Make sure gdrive gets started
  ansible.builtin.systemd:
    state: started
    daemon_reload: yes
    enabled: yes
    name: home-bears-gdrive.mount
  become: true
- name: Make sure gdrive.automount gets started
  ansible.builtin.systemd:
    daemon_reload: yes
    enabled: yes
    name: home-bears-gdrive.automount
  become: true
Aside
Right now the transcoded videos get thrown back into Google Drive alongside the originals because I don't trust the system yet. That being said, I couldn't figure out how to get Tdarr itself to put the finished transcoded videos back into Google Drive correctly. My workaround for this is to put the transcoded videos into another folder on my NAS that regularly gets polled for files and sends those to Google Drive.
Docker Compose
So we've configured all our mounts correctly, now we need to actually run the Tdarr node. Rather than worry about dependencies, especially if I decide to run GPU encodes in the future, I turned to my favorite golden hammer docker compose. Docker compose as a tool lets you define the configuration for a docker container in a .yml file. When I combine docker compose with Ansible's Jinja templating I'm able to deploy a customized docker compose file to each node. Each node's docker compose file needs to be custom because the Tdarr node container expects nodeIP and serverIP environment variables. Barring that need, templating also allows me to set descriptive node names with nodeID.
tdarr-node:
    container_name: tdarr-node
    image: haveagitgat/tdarr_node:latest
    restart: unless-stopped
    network_mode: host
    environment:
      - TZ=America/Chicago
      - PUID=1000
      - PGID=1000
      - UMASK_SET=002
      - nodeID={{ ansible_default_ipv4.address }} # This is the IP used to
      - nodeIP={{ ansible_default_ipv4.address }} # connect with Ansible*
      - nodePort=8267
      - serverIP=192.168.7.101 # This is the local IP for my Tdarr server
      - serverPort=8266
    volumes:
      - /docker/tdarr/configs:/app/configs
      - /docker/tdarr/logs:/app/logs
      - /home/bears/gdrive/yogscast:/home/bears/gdrive/yogscast
      - /data:/data
From there we're basically done. I can point the ansible script at a Debian based machine on my local network and have it show up as a node on the Tdarr server in minutes.
But that's not quite good enough, is it?
Azure's Part to Play
I realized after I automated Tdarr node deployment that there wasn't any reason why my nodes had to remain on the local network. It occured to me that I had free credit with Microsoft's Azure and I could use that credit to transcode video. To undertake this endeavour most of the setup remains the same bar one crucial component. Tdarr's not intended to run over the unsecured internet and that's where Wireguard comes in. I already run a Wireguard VPN to connect to my local network so all I need to do is connect the Tdarr server to the VPN and edit my playbook to install and configure Wireguard on remote hosts.
When deploying Wireguard once again my saving grace is templating. Remote nodes can't use the same serverIP as local nodes and local nodes can't use the same serverIP as remote nodes. To solve that problem I define some environment variables for my hosts wg=10.13.13.7 and wg_file=peer6 and add some conditionals to my docker compose template - nodeIP={{ wg is defined | ternary(wg, ansible_default_ipv4.address) }} and - serverIP={{ wg is defined | ternary("10.13.13.5", "192.168.7.101") }} This template logic assumes a default of local node configuration options, but when wg is defined it switches over to the Wireguard IP addresses for server and node. After that it's a simple matter of installing Wireguard and its dependencies.
- name: get current kernel, we need this to install linux-headers for wireguard
  ansible.builtin.shell: uname -r
  register: result
- name: Install Wireguard
  apt:
    pkg:
    - linux-headers-{{ result.stdout }}
    - wireguard
    - resolvconf
  become: true
  when: wg is defined
- name: Configure Wireguard
  ansible.builtin.template:
    src: "{{ wg_file }}.conf" # a supplied environment variable
    dest: /etc/wireguard/
  become: true
  when: wg is defined
- name: wg-quick setup
  ansible.builtin.shell: "wg-quick up {{ wg_file }}"
  ignore_errors: true # poorly solves an error on existing wireguard interfaces
  when: wg is defined
Results
From my typical cloud-init VM it takes less than two minutes to run the described Ansible playbook and have the node show up in Tdarr as shown in the video below. As of the time of writing Tdarr reports 17 successful transcodes and a space savings of 57 GB down from 107 GB. My Azure credits are in use on a Standard F4s v2 (4 vcpus, 8 GiB memory) VM. I experimented with deploying Tdarr nodes on AWS and GCP free tier micro VMs and while they can do stream ordering, the second Tdarr asks one of these micro VMs to transcode they fail out. No such thing as a free lunch I suppose.